Have you ever heard of cryotherapy?
This cold therapy treatment has been making the rounds in recent years and is proving to be increasingly popular. Chances are, you may have even encountered it yourself. But what does cryotherapy entail, exactly?
With so many promising benefits and claims, cryotherapy asserts itself as an effective treatment for a variety of health issues and medical conditions. However, there are also certain risks to be aware of before jumping headfirst into the cold.
This article will explore all things related to cryotherapy, including its uses, how it works, and its different types. The benefits, risks, and other common questions about this chilling treatment will also be discussed. Let’s get right into it!
What Is Cryotherapy?

Cryotherapy is a form of treatment that involves cooling parts of the body to near-freezing temperatures.
You may have encountered similar treatment in the removal of warts, skin tags, moles, or other types of abnormal tissue and skin cells. In this process, a coolant such as liquid nitrogen is applied to a problem area.
While localized cryotherapy has been firmly established for decades, it’s whole-body cryotherapy that’s now becoming a popular solution to body aches and pains, mental health conditions, and other issues.
For this process, people enter a cryochamber or cryosauna and are exposed to sub-zero temperatures produced by liquid nitrogen.
Exact temperatures vary, but they tend to fall somewhere between –150 to –220 degrees Fahrenheit.
Patients are required to wear a minimal amount of protective clothing that covers facial areas and ears.
The longevity of cryotherapy effectiveness is uncertain, with some studies suggesting that the treatment has little long-term effect.
However, the short-term effects (which can last up to 90 minutes) are proven to be significant and form an important part of recovery from certain injuries.
What Is Cryotherapy Used For?
Cryotherapy, also known as cryogenic therapy, has a wide range of uses and applications. Here are some of the most common:
-
Pain relief - One of the primary uses of cryotherapy is to reduce inflammation and relieve chronic pain from injuries, arthritis, migraines, and more. The extreme cold helps block pain receptors and release endorphins, which act as natural painkillers.
-
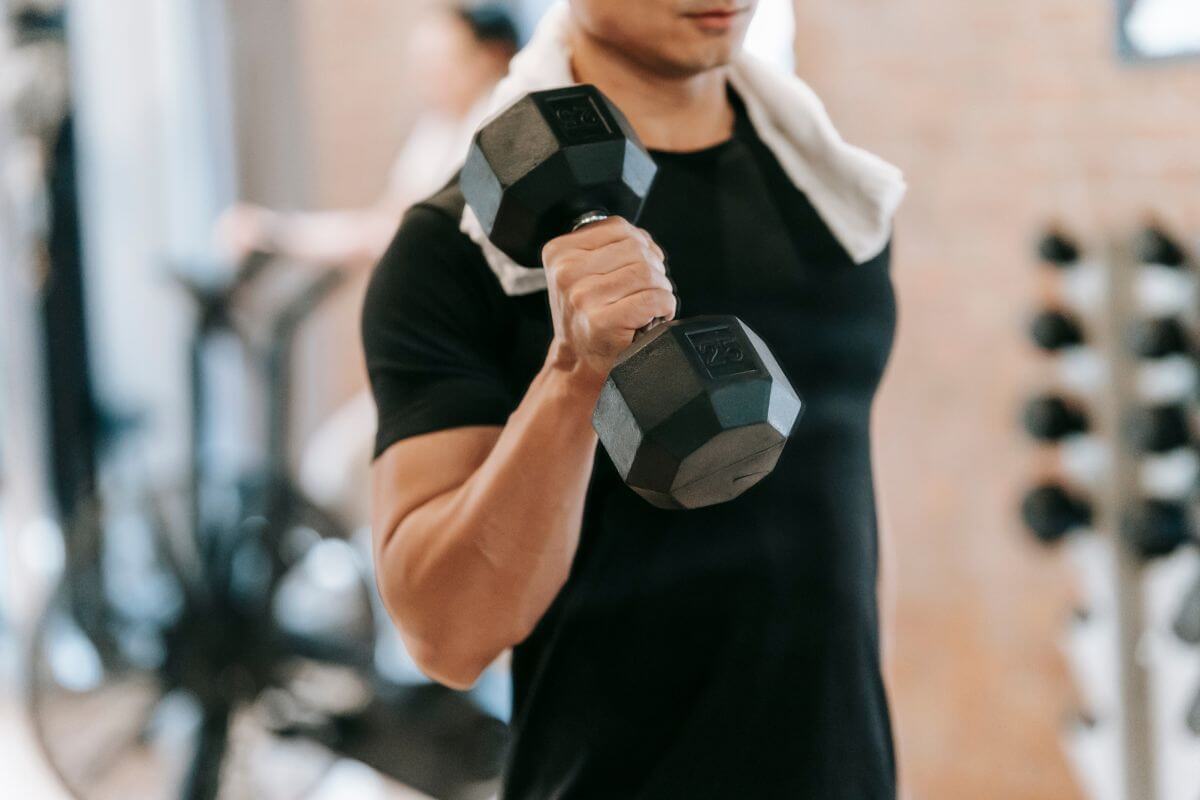
Recovery - Whole-body cryotherapy helps facilitate recovery after workouts, intense training, or competition. It reduces exercise-induced inflammation and soreness. This speeds up recovery time and allows non-elite and elite athletes to train harder.
-
Weight loss - Cryotherapy boosts your metabolism, which helps burn calories and fat. It also reduces cellulite. Many use cryotherapy chambers as an aid for weight loss goals.
-
Anti-aging - The cold temperatures increase collagen production, which helps reduce signs of aging like wrinkles and sagging skin. Cryotherapy facials can rejuvenate skin and tighten pores.
-
Mood disorders - Research shows cryotherapy can help alleviate symptoms of anxiety, depression, seasonal affective disorder, and even dementia. Endorphins are released and they act as mood boosters.
-
Autoimmune diseases - For conditions like rheumatoid arthritis, multiple sclerosis, and fibromyalgia - cryotherapy reduces painful flare-ups and inflammation.
-
Circulation - The cold causes vasoconstriction of blood vessels followed by vasodilation. This improves circulation and provides pain relief.
Nerve issues and migraines are also on the list of issues that are said to be partially treatable through the use of cryotherapy.
In particular, a 2008 study shed a positive light on the role of cryotherapy in reducing levels of depression and anxiety.
This study was conducted over three weeks. After the first week, an observable difference between the control group (who didn’t experience cryotherapy) and the study group (who experienced whole-body cryotherapy) was noted.
How Does Cryotherapy Work?
Exposure of the body to sub-zero temperatures is said to trigger the body’s natural anti-inflammatory response. This helps to reduce muscle pain and induce the release of endorphins for its potential benefits.
As the body experiences these extreme conditions, the blood vessels constrict and blood flows to the body’s core in order to protect vital organs.
With the more direct and intense application of liquid nitrogen to specific abnormal cells, warts, and malignant growths can be killed. This specific form of cryotherapy is known as cryoablation.
Are There Different Types of Cryotherapy?

You may be surprised by the different forms of cryotherapy that are available out there.
Easing the pain of a bumped knee with an ice pack, taking an ice bath, and having a wart removed by a dermatologist are all forms of cryotherapy!
Technically speaking, any treatment that involves the use of sub-zero temperature is itself a type of cryotherapy.
With the increasingly popular belief in cryotherapy’s effectiveness, we continue to see more types of cryotherapy emerge (such as cryotherapy facials).
The main types of cryotherapy are:
-
Whole Body Cryotherapy - This involves standing in an enclosed cryotherapy chamber or sauna with just the head exposed. The entire body is exposed to ultra-low temperatures ranging from -150°F to -220°F for several minutes.
-
Partial Body Cryotherapy - This targets specific areas of the body such as the arms, legs, back, or stomach. Temperatures are slightly warmer than the whole body at -1630°F to -210°F. The targeted area receives the benefits.
-
Localized Cryotherapy - This is the application of an extremely cold probe to small surface areas of the skin. Probes cooled with liquid nitrogen or argon gas are applied for brief periods of 20-60 seconds. This is usually used to remove benign skin lesions.
-
Cryotherapy Facials - Special cryotherapy wands or masks cooled with liquid nitrogen are used on the face to improve skin appearance, tighten pores, increase collagen, and reduce inflammation from acne or rosacea.
-
Cryosurgery - The extreme cold is used internally to destroy abnormal tissues in warts, small skin tumors, and certain skin cancers with this minimally invasive treatment. Liquid nitrogen is applied directly with a cotton swab or spray device.
-
Ice Baths - Though not as extreme as other methods, athletes commonly use cold-water immersion and take ice baths for muscle recovery. Read more about the variety of ice bath benefits.
What Does a Cryotherapy Session Look Like
What your cryotherapy session looks like will depend heavily on which type of cryotherapy treatment you’re undergoing. That’s because the different forms of cryotherapy vary significantly.
For External Cryotherapy
Most types of cryotherapy are external. Even then, these different types of treatment will look very different from case to case.
Cryotherapy is a simple procedure when it comes to external abnormal cell removal (such as warts). A trained health professional will apply liquid nitrogen directly to the abnormal cells without making contact with any of the surrounding skin cells.
This is a quick and generally painless procedure, though you may feel a slight burning sensation on the small point of contact.
For entire-body cryotherapy treatment, the patient will be fully supervised and monitored. Minimal clothing is required to protect genitals, hands, and feet, as well as a band to protect facial features.
Once safely protected, you’ll enter a cryochamber or cryosauna where sub-zero liquid nitrogen is released.
Chamber cryotherapy sessions should never be longer than four minutes unless otherwise advised and overseen by a trusted health professional.
For cryotherapy facials, the customer goes through some initial steps before the actual treatment begins.
The practitioner will first cleanse and dry your face thoroughly and sometimes will also provide a lymphatic draining massage. They may also apply warm steam to your face before beginning with cryotherapy.
After these steps, you’ll be given goggles and asked to remove any jewelry from your ears or around your face and neck. Liquid nitrogen will then be applied at a sub-zero temperature to your face through a small hose.
This will feel very cold on the skin, but not much worse than close exposure to an open freezer.
For Internal Cryotherapy
Depending on the location of your abnormal cells, an internal cryotherapy procedure may require you to be administered with either local or general anesthesia.
A cryoprobe will be inserted into your body through a small incision to reach the abnormal cells. Ultrasound imaging may be used to help guide the cryoprobe to the targeted cells.
How Do You Prepare for Cryotherapy Sessions?
How to prepare for a cryotherapy session again depends on what type of cryotherapy session you are undergoing. Some are completely non-invasive, while internal cryotherapy will be invasive.
A medical professional will be able to advise on how to best prepare yourself for internal cryotherapy.
Having someone to look after you after the session may be necessary, so make sure to make necessary plans beforehand!
What Happens after a Cryotherapy Session?
What happens after a cryotherapy session will vary again depending on the type of treatment you’ve received.
In saying that, you may notice immediate observable results for external therapies such as a cryochamber session or a cryotherapy facial.
After External Cryotherapy
After a cryotherapy facial, the skin should immediately appear brighter – just as it does after a walk out in the cold winter air. It may also appear tighter and you may notice the reduced appearance of wrinkles.
After full-body cryotherapy, patients tend to feel significant relief from pain for around 90 minutes. However, it should be noted that pain will likely return after this time.
If you underwent a targeted cryotherapy session for the treatment of abnormal cells, the affected area will form a scab that should quickly fall off after a few days.
After Internal Cryotherapy
After an internal cryotherapy procedure, a burning or otherwise painful sensation may be felt in the affected area for up to three days.
If it persists beyond that, be sure to consult a medical professional.
What Are the Benefits of Cryotherapy?

One benefit of internal cryotherapy, as opposed to a traditional surgical procedure, is that there is less chance of bleeding and less risk of harming the surrounding tissue.
If you’re experiencing soreness or inflammation, cryotherapy is a great short-term treatment for these ailments. It’s particularly popular among those who suffer from arthritis.
Cryotherapy can also work to increase your metabolism, which is beneficial to those with a low metabolic rate.
A higher metabolism also allows you to lose weight more effectively, so cryotherapy is frequently used to help patients shed excess pounds.
It’s also believed that cryotherapy can alleviate mental health issues, such as anxiety and depression.
Additionally, as we’ve already mentioned, cryotherapy also finds application for aesthetic purposes such as effective wart removal and facial care.
What Are the Risks of Cryotherapy?
The risks of cryotherapy treatments are relatively low, though there’s always a chance from intense cold exposure. Complications may occur because plunging your body into subzero temps is not without risk.
Possible risks of cryotherapy include:
- Possible swelling
- Nerve damage or joint pain in your knees and fingers can sneak up on you post-freeze.
- Pain and bleeding around the cervix
- Hypothermia and frostbite if sessions are too intense or overdone
- Permanent scarring
- Skin infection
- Can be risky for those with high blood pressure
Do be aware that cryotherapy treatments are not FDA-approved treatments for any condition. The FDA does not regulate nor approve cryo chambers because they're not considered "medical devices."
The bottom line is to exercise caution when using cryotherapy. Listen to your body, follow safety protocols, and consult your doc. With smart precautions, you can avoid becoming a medical ice sculpture. Just be cool and take it slow!
How to Speed Up Healing from Cryotherapy
It’s important to keep the areas affected by cryotherapy well-moisturized to stop them from drying out. Doing so will help to reduce the possibility of scarring.
Keeping the affected area hydrated will also speed up healing and lead to better end results.
Make sure to protect the area from excess friction to avoid unnecessary irritation. If a blister occurs, leave it alone. It should fade away in a few days.
If you’re concerned about bursting the blister, you can drain its fluid while keeping it intact. Keep the skin clean by washing daily with soap and water.
For whole-body cryotherapy, it’s important to allow your body to return to its normal temperature naturally. Don’t expose yourself to temperature extremes and do your best to take things easy.
Other Common Questions about Cryotherapy

Can You Use Cryotherapy for Weight Loss?
Though cryotherapy does not directly cause weight loss, it’s known to be able to speed up your metabolism.
A higher metabolic rate induces your body to process and burn fat at a faster rate.
What Is the Temperature Used for Cryotherapy?
The precise temperature used will vary from treatment to treatment. However, they tend to range between –100° and –140°C (–150° to –220°F).
Who Should Avoid Doing Cryotherapy?
Whole-body cryotherapy should not be used by pregnant women or those with the following conditions:
- Raynaud’s syndrome
- Acute myocardial infarction
- Symptomatic lung disease
- Severe anemia
- Urinary tract disease.
Be sure to discuss any personal health conditions with a practitioner or medical professional before undergoing any form of cryotherapy.
Can You Have Cryotherapy at Home?
If you have a bath and access to ice, you can create your own cryotherapy experience at home.
It’s best not to bathe for an excessive amount of time (no longer than 15 minutes), and it’s advisable to have a support person present to monitor the process.
What Is the Watery Discharge after Cryotherapy?
Women may experience water discharge containing traces of blood after an internal cryotherapy procedure.
This is a bodily function that expels cells that were killed during the procedure.
If you had external cryotherapy, the treated area can develop blisters. This is normal and should pass in a few days. If it’s uncomfortable, you can drain the fluid from the blisters as long as you keep it intact.
What Is the Success Rate of Cryotherapy for Prostate Cancer?
One study showed that for low-risk prostate cancer patients, there was a 96.4% success rate. Meanwhile, there was found to be a success rate of 62.2% for high-risk patients.
What Is the Difference between Cryotherapy and CoolSculpting?
CoolSculpting is a special treatment designed to reduce fat in parts of the body that tend to be difficult to target using traditional exercise or dieting methods.
By itself, cryotherapy is not generally proposed as a method of reducing weight.
Are Cryotherapy and Ice Baths Similar?
Ice baths, if below sub-zero temperature, are a form of cryotherapy.
This is a type of treatment that you can do yourself at home, though you should take care and have someone on hand to monitor your progress.
What Is the Cost of Cryotherapy?

The cost of cryotherapy depends entirely on the type of treatment you are undergoing and where you go for a session.
For a cryochamber or cryosauna session, you may be looking at $60 to $100.
If you continue to receive treatments from the same practitioner, you should inquire into any special offers they may have available.
When to Go See a Doctor
If irritation, bleeding, or unprecedented flu-like symptoms occur and persist after treatment, seek immediate medical advice from a trusted health professional!
Sources:
]]>